Raster vs Vector for Canva Users (Without the Design Degree)
If you’ve ever wondered what raster vs vector actually means – or why your Canva logo becomes blurry when resized – the answer lies in how the image is built. Understanding the difference between raster and vector files removes almost all of the mystery around resizing problems.
You know the scenario: You create a logo in Canva and it looks crisp, clean, and completely professional. On your screen, everything feels finished.
You download it. You upload it to your website. It still looks good. At this point, there’s no reason to question anything.
However, the moment you send that same file to a printer, something changes. The edges look softer than you remember. Then, when you resize it for a banner, it starts to look slightly tired – not broken, just less confident than it did before.
Naturally, you Google:
“Why is my logo blurry?”

Within minutes, you find yourself in a design rabbit hole filled with intimidating words: raster, vector, DPI, SVG, resolution, pixels. Canva explains its download file types – including when SVG is available – in its official guide to file formats. Each explanation seems to assume you already speak designer.
But you don’t need to.
In fact, you don’t need technical vocabulary at all. You only need one simple mental picture. Once you see it, everything else starts to make sense.
Why Raster vs Vector is so confusing in Canva
Here’s the honest truth: nobody explains this at the right time.
Design software allows you to create beautiful things long before you ever need to understand how images technically work. Canva, in particular, is brilliant at lowering the barrier to entry. You open it, you drag a few elements around, and within minutes you have something that looks polished. No training required.
Because of that, most people naturally design first and learn later.
At the beginning, this works perfectly. Your graphics look sharp on screen, your layouts feel balanced, and everything behaves exactly as expected. However, the moment your design leaves that original environment, the rules quietly shift.

For example, when a graphic moves from screen to print, it behaves differently. Likewise, when it needs to be resized significantly larger, new limitations appear. The same applies when a logo must exist across multiple contexts – from a tiny website header to large-format signage.
Suddenly, something that looked flawless starts to look soft or slightly off.
At that point, it feels unfair. After all, you did not change the design. You did not suddenly forget how to align text or choose colours. Instead, you encountered a structural boundary that simply was not visible earlier.
In other words, this is not a skill issue. It is a format issue. This is also one of Canva’s built-in structural limitations – not a flaw, but a boundary that becomes visible when designs leave their original environment. If you’d like a broader look at where Canva shines and where it reaches its limits, you can read the full breakdown here.
Once you understand that distinction, the confusion starts to dissolve – because you realise the problem was never your ability. It was the environment the file needed to live in.
Raster vs Vector explained simply (In a way your brain will remember)
At first glance, the difference between raster and vector sounds technical. However, the real distinction is surprisingly simple once you see it visually.
Instead of thinking in file formats, think in structure.
To begin with, imagine standing in front of a pointillism painting – one created entirely from tiny dots of colour. From across the room, the image looks smooth and complete. You see faces, landscapes, depth. In other words, your brain blends the dots into something cohesive.
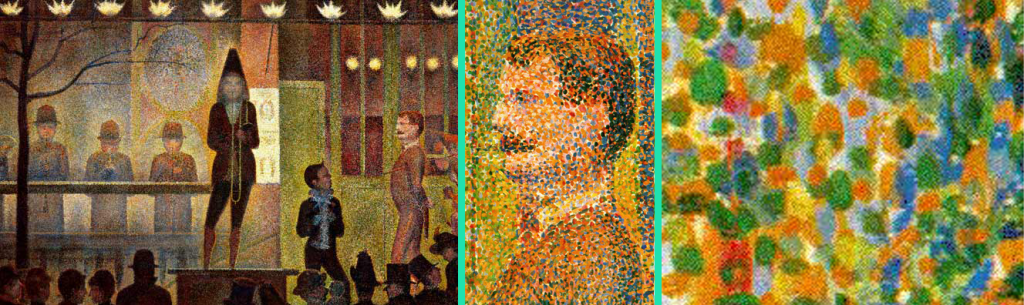
However, as you begin to step closer, your experience changes.
Rather than seeing smooth edges, you start noticing individual dabs of paint. And as you move even closer, the illusion of continuity fades almost entirely. Instead of “the picture,” you now see separate clusters of colour sitting beside each other.
Importantly, the painting itself has not changed.
What changed was your distance from it.
A raster image works in exactly the same way.
When you design something in Canva, it appears crisp because you are viewing it at the size it was created for. Therefore, each pixel has a defined role, and together they create a clean visual impression.
However, when you enlarge that image, you are essentially stepping closer to the painting. The pixels do not multiply just because the canvas becomes bigger. Instead, the existing pixels are stretched to cover more space.
As a result, the computer must estimate what should exist between those stretched dots. And because estimation is not the same as real detail, the image gradually appears softer. Eventually, that softness becomes blur. If pushed further, it becomes visible blockiness.
In other words, nothing is broken. The image has simply reached the limit of the detail it was originally given.
Now, in contrast, consider how an architect designs a perfectly round window.
A blueprint does not contain a photograph of a circle. Instead, it contains the instructions for constructing one: the centre point, the radius, and the mathematical relationship that defines the curve. Because these elements are stored as measurements rather than pixels, they remain proportionally accurate at any size.

Therefore, whether the window is built at 50 centimetres wide or 5 metres wide, the curve remains perfectly smooth. It is not stretched. Instead, it is recalculated and redrawn according to the same underlying rules.
A vector image functions in this way.
Rather than storing fixed dots, it stores relationships and instructions. Consequently, every time you resize it, the computer redraws the shape from scratch using those instructions. As a result, edges stay sharp, curves stay clean, and proportions remain consistent.
So when someone says, “Your logo should be vector,” they are not criticising your design. Instead, they are pointing out that logos need to behave like architecture rather than paintings.
Ultimately, once you understand this structural difference, resizing problems stop feeling mysterious – because you can see exactly why they occur.
However, if your Canva design looks sharp inside the editor but exports blurry even at the correct size, that’s a different issue entirely – and we’ll fix that step-by-step in the next guide.
Raster vs Vector in Canva (And Why Canva uses Raster first)
At this point, it might be tempting to assume that raster is somehow “less professional.” However, that isn’t accurate – and it’s important to say that clearly.
Canva is not purely raster-based. In fact, it does support vector elements in certain contexts, such as shapes, icons, and SVG downloads on specific plans. However, the overall design experience is built around a raster-first workflow. That choice is not a limitation. It’s a design decision.
To understand why, consider the alternative.
True vector editing software exposes the underlying structure of shapes. You can manipulate anchor points, curve handles, path directions, and alignment grids. While that level of control is powerful, it also introduces complexity. Small adjustments can require technical precision, and creative flow can slow down quickly if you do not already understand the mechanics.
Canva, by contrast, prioritises accessibility. Instead of asking you to think about mathematical paths, it allows you to think visually. You drag, you resize, you rotate – and the design responds predictably on screen. As a result, you can focus on layout, hierarchy, colour, and messaging rather than geometry.
This is particularly valuable in the early stages of design. When you are experimenting with fonts or testing proportions, you do not need architectural precision. You need speed, clarity, and creative momentum.
Therefore, Canva’s raster-first approach is not about cutting corners. It is about removing friction. It allows you to design confidently without having to manage the structural mathematics underneath.
For most digital content – which is where the majority of Canva projects live – this approach is not only sufficient, it is ideal.

Where Raster Works Beautifully
Once you understand what raster is designed to do, it becomes much easier to see where it shines.
To begin with, photographs are naturally raster. Cameras capture continuous light, shadow, gradients, and texture. Because of that, raster is the most accurate way to store that richness. A vector version of a photograph would not look realistic; it would look illustrated. Therefore, for imagery, raster is not a compromise – it is the correct format.
Similarly, social media graphics live within fixed display environments. An Instagram post, for example, appears at a specific size on a screen. Even if someone taps to expand it slightly, they are not enlarging it to billboard scale. As a result, the detail you designed is exactly the detail your audience will see.
The same logic applies to presentations, PDFs, ebooks, online ads, and course slides. Screens themselves are pixel-based. Consequently, exporting pixel-based images for pixel-based displays creates no loss of quality.
Even when Canva elements are technically vector inside the platform, the moment you export as a PNG or JPG, the file behaves as raster – which, in these contexts, is entirely appropriate.
In other words, raster only becomes a concern when a design needs to grow beyond the environment it was created for. Within its intended space, it performs beautifully.
And for most Canva users, that space is exactly where their designs will stay.
Where Raster Starts to Struggle (And Vector Becomes Necessary)
Up until now, raster has behaved beautifully. However, its limitations become visible the moment a design is asked to exist beyond the size it was created for.
This is where most frustration begins.
A logo, for example, rarely lives in just one place. At first, it might sit neatly in a website header. Later, it appears on social banners. Eventually, it may need to exist on packaging, signage, or a large-format print.
At that point, the file is no longer being viewed at its original “distance.” Instead, it is being stretched into new physical space.
Because raster images contain a fixed number of pixels, enlarging them does not create new detail. Rather, it redistributes existing pixels across a larger area. As a result, the software must estimate how to fill in the gaps. That estimation softens edges and blurs curves, even though the original design was clean.
The same pattern appears with large prints. A flyer often looks perfectly sharp because it remains relatively close to its design size. In contrast, a pull-up banner or oversized poster may expose the limits of the file. The image has not deteriorated; it has simply been asked to perform outside its original scope.
Even repeated resizing can contribute to this effect. Each time a raster file is exported, uploaded, resized, and exported again, it is being reinterpreted. Although each individual change may seem minor, the cumulative effect can gradually reduce crispness.
In other words, raster struggles when scalability becomes essential. It is not fragile – it is finite.
The “Version 1” Connection
This is where perspective becomes important.
Canva is exceptionally strong at helping you discover what a design should look like. You experiment with layout, refine typography, test colour combinations, and adjust spacing until everything feels aligned. That creative decision-making is not temporary work. In fact, it is the most valuable part of the process.
However, visual discovery and structural permanence are two different stages.
Once a logo has proven that it communicates clearly and feels right across digital contexts, a new requirement may emerge: it needs to scale indefinitely. At that point, the question shifts from “Does this look good?” to “Can this exist at any size without losing integrity?”
That is when vector becomes relevant.
Not because the Canva design was wrong.
Not because raster is unprofessional.
But because branding elements often need architectural stability rather than fixed visual detail.
Therefore, it can be helpful to think of many Canva designs as Version 1 – not unfinished, but foundational. They establish proportions, hierarchy, and personality. If the design later needs infinite scalability, it can then be formalised in vector format without altering its visual identity.
Create freely first.
Refine structurally only when necessary.
That sequence removes urgency and replaces it with clarity.

The Simple Truth: What Raster vs Vector Really Means for You
Ultimately, you do not need to master vector software to design effectively.
Most Canva projects live entirely within digital environments. They appear on screens, inside presentations, across social feeds, and within downloadable documents. In those contexts, raster performs exactly as intended.
Only a small category of designs requires more – typically logos and core branding elements that must exist at dramatically different physical sizes.
Therefore, instead of worrying about file types while you design, you can ask a single question at the end of the process:
Will this need to grow beyond the screen?
If the answer is no, you are finished. Export confidently.
If the answer is yes, the design has simply reached a new stage – one where structure matters as much as appearance.
Once you understand that distinction, blurry logos stop feeling mysterious. Instead, they become predictable. And when something is predictable, it is manageable.
That shift – from confusion to clarity – is what this entire conversation was meant to create.